Homemade Onion Jam: Caramelized Goodness for Burgers & More
Imagine a condiment so rich, so deeply flavorful, it transforms an ordinary burger into a gourmet masterpiece. Picture a spread that elevates a humble piece of toast or a simple cheese board into an exquisite culinary experience. This isn't some rare, expensive delicacy – it's homemade onion jam, and mastering
how to make onion jam is surprisingly simple. This caramelized, sweet, and savory delight is a game-changer for any home cook looking to add a touch of sophistication and incredible taste to their meals. Forget store-bought options; nothing compares to the luscious depth of flavor you can achieve right in your own kitchen.
Why Homemade Onion Jam is a Culinary Game-Changer
Onion jam is more than just a topping; it's an experience. Its unique profile combines the inherent sweetness of slow-cooked onions with a savory depth, often brightened by a hint of acidity. This complexity makes it incredibly versatile. While it’s famously delicious on burgers and hot dogs, its potential extends far beyond the grill. Think about spreading it on a crispy cracker with a dollop of goat cheese, slathering it onto a grilled cheese sandwich for an elevated lunch, or even pairing it with roasted meats like pork loin or chicken.
The beauty of making it yourself lies in the control you have over the ingredients and the customization possibilities. You can adjust the sweetness, the tartness, and the herb blend to perfectly suit your palate. Plus, the aroma that fills your kitchen as the onions slowly caramelize is an experience in itself – a true testament to the simple magic of good food. For more straightforward approaches to this delicious condiment, check out our guide on
How to Make Onion Jam: Easy Recipe for Sweet & Savory Flavor.
Mastering the Art of Caramelization: How to Make Onion Jam Step-by-Step
Learning
how to make onion jam hinges on one crucial technique: proper caramelization. This low-and-slow cooking process coaxes out the natural sugars in the onions, transforming their pungent bite into a tender, golden sweetness.
Essential Ingredients You'll Need
One of the best aspects of this recipe is that it calls for common pantry staples, proving that extraordinary flavor doesn't require exotic ingredients.
*
Onions: The undisputed star! While yellow onions are often recommended for their high sugar content and balanced flavor, don't hesitate to experiment. Red onions offer a beautiful color and a slightly sharper, fruitier tang, while white onions provide a milder base. Any variety you have on hand will work, so feel free to mix and match!
*
Olive Oil: A good quality extra virgin olive oil provides the base for sautéing, helping the onions soften and begin their caramelization journey. You could also use a neutral oil like grapeseed or avocado oil.
*
Balsamic Vinegar: This is the secret weapon that elevates the jam from merely sweet to wonderfully complex. Its rich, slightly tart, and acidic notes cut through the sweetness, adding depth and a beautiful dark hue. White balsamic vinegar offers a similar tang without darkening the jam as much. A high-quality aged balsamic will make a noticeable difference in the final product.
*
Sugar: While onions naturally sweeten as they cook, a touch of brown sugar or granulated sugar helps to kickstart the caramelization process and achieve that ideal jam-like consistency and sweetness.
*
Fresh Herbs: Thyme and rosemary are classic choices that complement the onions beautifully.
*
Thyme: Offers an earthy, subtly floral note that doesn't overpower. If using dried, remember to use about half the amount of fresh (e.g., 1 teaspoon dried per tablespoon fresh).
*
Rosemary: Provides a more pungent, piney, and slightly minty flavor. Use sparingly, as it can be strong. Again, half the amount if using dried. You can also experiment with bay leaf or a pinch of red pepper flakes for a subtle kick.
*
Salt & Black Pepper: Essential for balancing and enhancing all the flavors. Season to taste.
Simple Equipment for Success
You don't need fancy gadgets to make incredible onion jam. Most likely, you already have everything required in your kitchen:
*
Paring Knife & Chef's Knife: For peeling and slicing onions.
*
Cutting Board: A sturdy surface for safe prep.
*
Large Frying Pan or Dutch Oven: A wide, heavy-bottomed pan ensures even cooking and prevents scorching. A Dutch oven is excellent for slow, consistent heat.
*
Wooden Spoon or Heat-Resistant Spatula: For stirring.
Step-by-Step Instructions for Homemade Onion Jam
1.
Prepare Your Onions: Peel and thinly slice your onions. Aim for uniform slices to ensure even cooking. The thinner the slices, the faster they'll break down.
2.
Sauté to Soften: Heat the olive oil in your large pan or Dutch oven over medium-low heat. Add the sliced onions along with a generous pinch of salt. Stir well to coat.
3.
Begin the Caramelization (The Long Slow Cook): This is where patience is key. Cook the onions over *low* to *medium-low* heat, stirring frequently (every 5-10 minutes) for 30-45 minutes, or even longer. The goal is to slowly soften them and allow their natural sugars to emerge and caramelize. They will gradually turn translucent, then golden, and finally a rich, deep brown. Do not rush this step with high heat, or they will burn instead of caramelize.
4.
Add Sweetness and Acidity: Once the onions are deeply caramelized and tender, stir in the sugar, balsamic vinegar (or white balsamic), and your chosen fresh herbs (thyme, rosemary).
5.
Simmer and Reduce: Bring the mixture to a gentle simmer. Continue to cook, stirring occasionally, for another 15-20 minutes. The liquid will reduce and thicken, transforming into a sticky, jam-like consistency. The balsamic vinegar will reduce and intensify its flavors, melding beautifully with the sweet onions.
6.
Season and Adjust: Taste the jam. Add more salt or pepper if needed. If it's too tart, a tiny pinch more sugar can balance it. If it's too thick, a tablespoon of water can loosen it slightly. The texture should be soft, spreadable, and lusciously rich.
7.
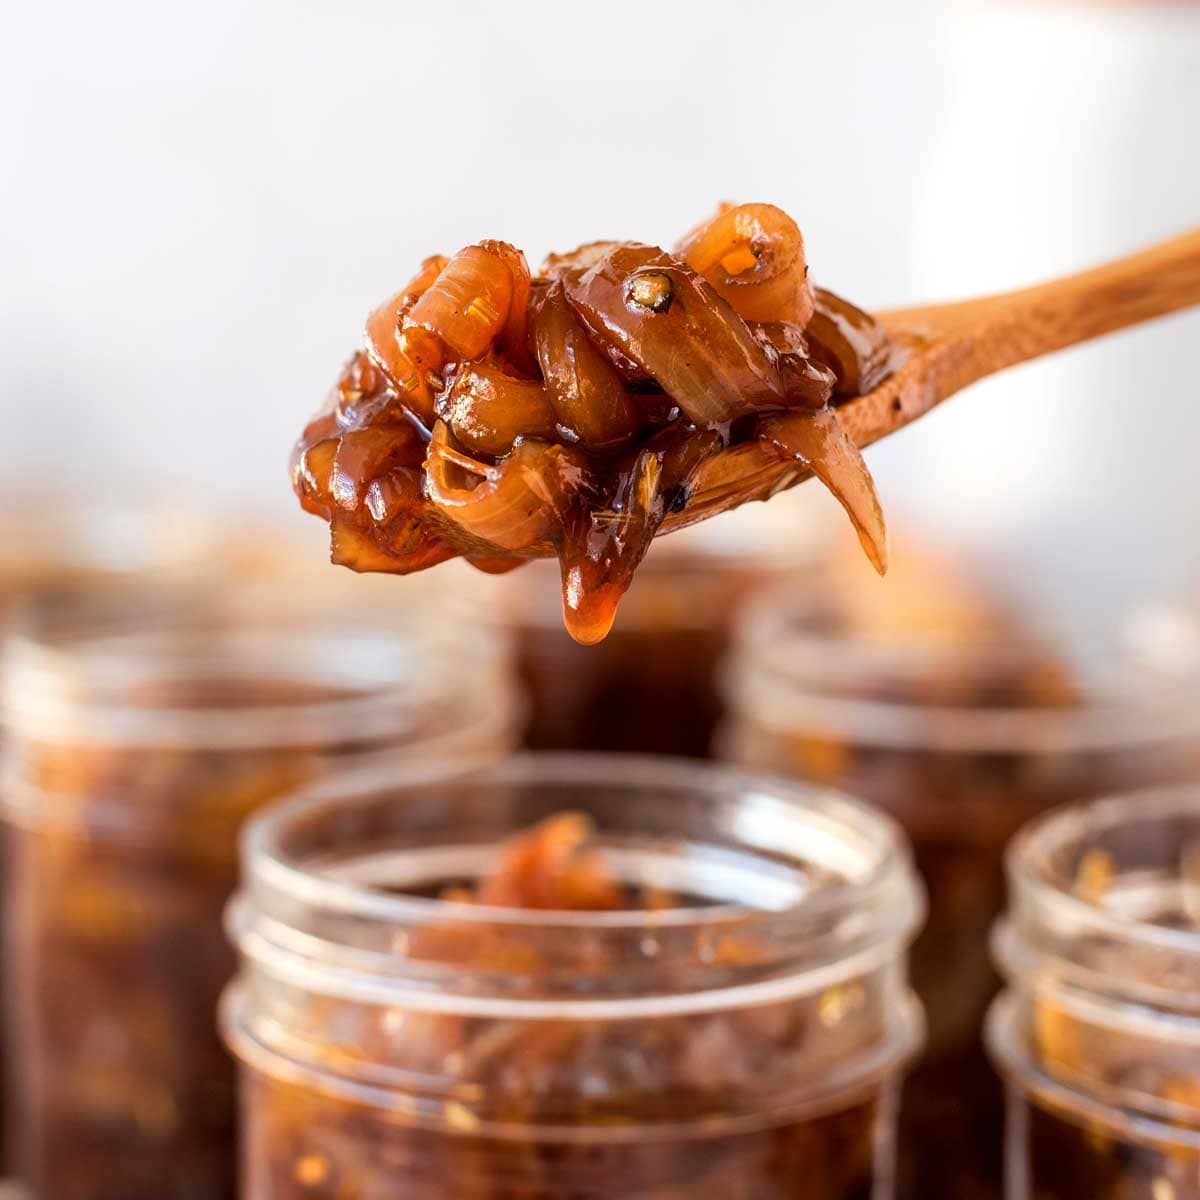
Cool and Store: Remove from heat and allow the onion jam to cool slightly before transferring it to clean jars.
Tips for Success and Customization
*
Patience is a Virtue: The most common mistake is trying to rush caramelization. Low heat and plenty of time are your best friends for achieving that deep, sweet flavor without bitterness.
*
Don't Skip the Balsamic Reduction: The vinegar isn't just for tang; its reduction process concentrates its unique flavor, adding an incomparable richness and complexity that makes homemade onion jam truly special.
*
Experiment with Onions: While yellow onions are excellent, try a mix of red and yellow for varied flavor and visual appeal.
*
Get Creative with Spices: Beyond thyme and rosemary, consider a touch of smoked paprika for a smoky undertone, a pinch of cayenne for a subtle kick, or even a bay leaf removed before serving. You can also explore different vinegars like red wine vinegar for a different flavor profile. For more inspiration on tailoring your jam, see our article on
Quick Onion Jam Recipe: Customize Your Savory-Sweet Condiment.
*
Consistency Check: If your jam seems too thin after cooling, you can gently simmer it a bit longer. If it's too thick, a splash of water or a tiny bit more vinegar can help.
Beyond the Burger: Creative Ways to Enjoy Your Onion Jam
Once you’ve mastered
how to make onion jam, you’ll find endless ways to incorporate this versatile condiment into your cooking.
*
Cheese Boards & Appetizers: Pair with strong cheeses like cheddar, blue cheese, or goat cheese. Serve on crostini, crackers, or alongside cured meats.
*
Sandwich & Wrap Enhancer: Spread it on grilled cheese, turkey sandwiches, or any wrap for an instant flavor boost.
*
Breakfast & Brunch: A dollop on scrambled eggs, a savory crepe, or even alongside bacon.
*
Roast Accompaniment: Serve with roasted chicken, pork tenderloin, or even a simple steak for an elegant touch.
*
Pizza Topping: Spread a thin layer on pizza dough before adding cheese and other toppings for a gourmet pie.
*
Marinade Component: Whisk a spoonful into a marinade for chicken or pork for added depth.
Storing Your Homemade Goodness: Fresh vs. Canning
Once cooled, transfer your homemade onion jam to clean, airtight jars. It will keep beautifully in the refrigerator for up to 2-3 weeks. The flavors often deepen and meld even more after a day or two.
For longer storage, onion jam can be canned using a proper water bath canning method. If you choose this route, ensure you follow tested canning recipes and guidelines for acidity and processing times to ensure food safety. This allows you to enjoy your delicious creation for months to come.
Conclusion
Learning
how to make onion jam is a rewarding culinary journey that yields a truly spectacular condiment. Its sweet, savory, and subtly tart profile makes it an indispensable addition to your kitchen arsenal, ready to elevate everything from a weeknight burger to an elaborate cheese board. With simple ingredients and a little patience, you can create a lusciously rich jam that will have everyone asking for more. So gather your onions, embrace the low-and-slow cooking, and prepare to delight your taste buds with this caramelized goodness.